Homeownership is a source of pride and long-term security, but it also carries the responsibility of managing unexpected structural and mechanical failures. An unexpected pipe failure, a storm-damaged roof, or a sudden loss of winter heating can transform a quiet evening into a stressful situation. In these critical moments, waiting hours for an emergency response team without taking immediate action can double the total damage to your property.
Most homeowners operate reactively rather than proactively. They wait for a crisis to occur before searching for main shut-off valves, looking for emergency tools, or searching for reliable service providers. This reactive approach leads to rushed decisions, inflated emergency service rates, and preventable damage to personal property and structural elements.
Emergency readiness is not about mastering every complex building trade or performing major structural overhauls yourself. Instead, it involves understanding how your home’s core systems function, knowing how to perform immediate damage control, and maintaining a clear network of qualified trade specialists. This guide outlines the essential emergency management strategies every homeowner needs to protect their investment, preserve household safety, and respond confidently when unexpected repairs arise.
Phase 1: Water and Plumbing Containment Strategies
Uncontrolled water is the single most destructive force inside a residential structure. A ruptured supply line can release hundreds of gallons of water per hour, soaking subfloors, destroying drywall, and creating ideal conditions for mold growth within 24 to 48 hours. Mastering immediate water containment is the foundation of household emergency readiness.
Every resident in your household should know the exact location of primary water shut-off valves and how to operate them. Waiting to locate a main valve while water actively fills a hallway causes severe, avoidable damage.
The primary main shut-off valve is typically located where the main water service line enters the home—often in a basement, crawlspace, or utility closet near the water meter. Fixture-specific isolation valves sit beneath sinks, behind toilets, and adjacent to washing machines or water heaters. These small angle stops allow you to isolate a single leaking fixture without shutting off water to the entire house. Keep a dedicated T-handle water meter key stored near your primary shut-off valve or inside your emergency toolkit so you can turn off the water directly at the street box if an interior valve seizes.
Triage and Professional Plumbing Integration
When a pipe freezes, corrodes, or splits, turn off the main water valve immediately. Next, open the lowest faucets in your home to drain remaining water from the supply pipes and relieve system pressure. For small pinhole leaks or split copper pipes, apply a temporary patch using rubber compression sleeves held by adjustable hose clamps, heavy-duty pipe repair tape, or two-part epoxy putty.
While temporary patches stabilize immediate leaks, permanent pipe repairs and deep drainage blockages require professional tools. Relying on experienced providers for local plumbing emergencies ensures that line replacements and backflow preventer installations meet current building codes.
Professional crews utilize video inspection cameras and motorized drain augers to clear stubborn root intrusions and main line blockages without damaging underground drainage pipes. Having established contacts for licensed local plumbers before an emergency occurs saves time when facing a midnight pipe failure or sewer backup. Experienced local plumbers carry specialized fittings, high-capacity pumps, and pipe thawing equipment, making them essential partners for major water crises.
Phase 2: Roof, Attic, and Building Envelope Stabilization
Your roof and exterior walls form the primary shield protecting your interior living spaces from weather exposure. When heavy winds, hail, or falling tree limbs compromise this protective shell, water can quickly enter the attic and cascade down through interior ceilings and walls.
When water drips through a ceiling during a heavy storm, your immediate goal is to contain the spread of moisture and prevent structural ceiling collapses.
Place large, wide plastic buckets or storage totes beneath active drips, lining the bottom of the container with old towels to prevent splashing. If water accumulates behind ceiling drywall to create a bulging pocket of paint, place a bucket directly beneath the bulge and use a screwdriver or nail to puncture a small hole in the center. Relieving this trapped water weight prevents the entire drywall sheet from collapsing under the load. Trace water trails upward along attic rafters to locate the primary entry point on the roof deck.
Temporary Tarping and Professional Roof Teams

Once the storm subsides and weather conditions allow for safe exterior work, temporary tarping prevents further rain intrusion until permanent roof repairs can be scheduled.
Never walk on a wet, steep, or structurally compromised roof. If you can safely reach the damaged area from a stable ladder, spread a heavy-duty woven polyethylene tarp over the damaged section. Extend the upper edge of the tarp over the roof ridge to prevent water from running under the top edge, and secure the perimeter using wooden furring strips screwed through the tarp into the roof deck.
Navigating steep slopes and handling heavy materials at heights carries significant safety risks. Reaching out to licensed roofing companies guarantees that structural roof repairs, underlayment installations, and flashing replacements are executed safely. Experienced roofing companies possess the safety harnesses, scaffolding, and commercial-grade materials required to secure your building envelope quickly after severe weather events.
Phase 3: Driveways, Hardscapes, and Perimeter Access Repairs
Severe storms, soil erosion, and freezing temperatures do not just affect your home’s interior; they can also damage exterior access routes, driveways, and retaining walls. Maintaining safe vehicle access and proper yard drainage is essential during property emergencies.
Heavy rainfall and severe freeze-thaw cycles can quickly wash away supporting soil beneath hardscape surfaces, causing asphalt to collapse and creating dangerous potholes or uneven drop-offs.
Deep driveway voids endanger vehicles and can block emergency access. For temporary repairs, clear loose debris from the hole, fill the bottom with crushed gravel, and apply cold-patch asphalt in two-inch layers, tamping down each layer firmly until the patch sits flush with the surrounding surface.
Saturated soil also exerts immense hydrostatic pressure against exterior retaining walls and concrete walkways. If an exterior wall shows signs of movement during heavy rain, clear plugged weep holes at the base of the wall using a long screwdriver or high-pressure hose nozzle to relieve trapped water pressure.
When driveway foundations settle, major soil erosion undermines concrete slabs, or structural retaining walls fail, basic patches are no longer enough. Soil stabilization, heavy grading, and hot-mix resurfacing require specialized heavy machinery.
Consulting a qualified paving contractor allows you to address underlying subbase erosion, correct improper drainage slopes, and install durable asphalt or concrete surfaces. A professional paving contractor brings the heavy rollers, excavators, and grading equipment required to restore safe perimeter access to your home.
Phase 4: Heating, Cooling, and Garage Access Emergencies
Mechanical failures in your home’s heating, cooling, or automated access systems are more than just inconvenient—during extreme winter freezes or summer heatwaves, they can quickly become health and safety hazards.
When your furnace or air conditioner stops working during extreme weather, systematically check basic system components before assuming major equipment failure has occurred.
Confirm that the thermostat has fresh batteries and is configured correctly. Check your main breaker panel to see if the dedicated circuit breaker for your HVAC unit has tripped. Inspect your air filter, as extremely dirty filters restrict airflow and cause furnace heat exchangers to overheat or AC coils to freeze into solid ice blocks. Additionally, check the condensate drain line; if the line clogs with algae, the safety float switch trips and cuts power to the unit to prevent indoor water overflow.
When winter heating fails completely, use safe secondary heat sources like portable electric space heaters, keeping them at least three feet away from curtains and furniture. Never use outdoor propane heaters, gas grills, or open charcoal burners indoors.
Managing Overhead Garage Door Failures
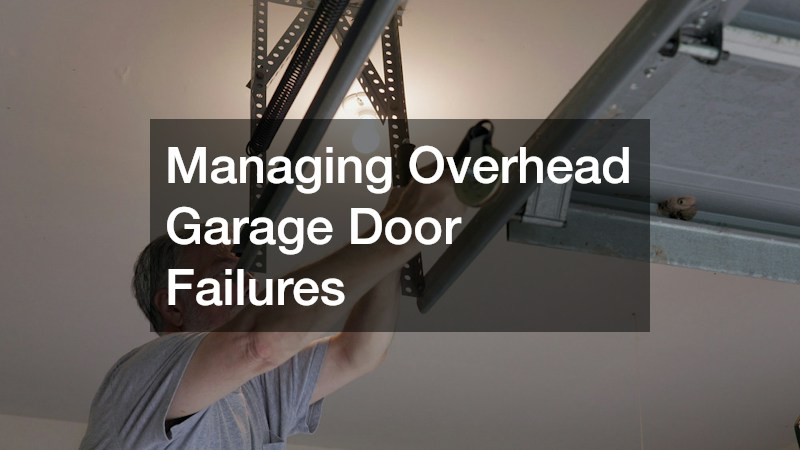
An overhead garage door is typically the largest and heaviest moving object in your home. When a torsion spring snaps, a lifting cable frays, or the opener motor fails, your vehicle can become trapped inside during an emergency evacuation.
If the door motor fails but the spring system remains intact, disengage the opener by pulling the red emergency release cord down and toward the motor so you can lift the door manually along its tracks. However, if a high-tension torsion spring above the door has snapped, do not attempt to lift the door or adjust the cable drums yourself.
Working with experienced professionals for residential HVAC services guarantees that furnace heat exchangers, heat pump compressors, and electrical control boards are diagnosed and repaired safely. Licensed HVAC services carry specialized gauges, diagnostic software, and replacement parts needed to restore indoor climate control quickly. Similarly, when high-tension garage door components snap, rely on professional garage door contractors to handle the repair safely.
Phase 5: Outdoor Features and Aquatic Hazard Containment
Outdoor amenities like swimming pools, spas, and extensive water features add value to your property, but they also bring unique mechanical and structural emergency risks. A split pool pipe or filter casing can release thousands of gallons of water near your home’s foundation in minutes.
Rapid water loss in a swimming pool indicates a structural leak or mechanical failure. Identifying and stabilizing the leak quickly protects nearby home foundations, retaining walls, and landscaping from water saturation.
Perform a simple bucket test to rule out normal evaporation by comparing water loss in a floating bucket to pool water loss over 24 hours. Small punctures or tears in vinyl pool liners can be stabilized underwater using specialized vinyl patch kits; clean the area around the tear, cut a round vinyl patch, apply underwater adhesive, and press the patch firmly over the tear. If a filter tank, multi-port valve, or pump housing splits under pressure, immediately switch off the dedicated circuit breaker at the pool sub-panel and close the main skimmer and drain suction valves to isolate the equipment pad.
Pool circulation systems feature high-pressure pumps, complex multi-port valves, gas heaters, and specialized underground piping networks. Attempting complex underground pipe repairs or electrical controls troubleshooting without specialized pool training can lead to equipment damage or safety hazards.
Enlisting the help of licensed local pool contractors ensures that pressure testing, underground line replacements, structural gunite repairs, and liner replacements are performed accurately. Professional local pool contractors possess specialized electronic leak detection equipment, pipe pressure rigs, and commercial replacement components to resolve major aquatic emergencies efficiently.
Phase 6: Interior Surface Restoration and Damage Containment
Once you have contained an active water leak, addressed roof damage, or restored utility services, focus shifts to protecting and restoring your interior living spaces. Acting quickly to dry, clean, and stabilize interior walls, ceilings, and flooring prevents secondary mold growth and minimizes long-term material replacement costs.
Standing water damages indoor floor coverings rapidly, and different materials require specific handling during drying operations.
When solid wood absorbs water, the planks swell, expand, and cup. Immediately clear standing water using a wet/dry vacuum, and set up commercial dehumidifiers and high-velocity air movers to dry the flooring steadily. Standard laminate flooring with fiberboard cores absorbs water quickly along seams, meaning damaged laminate planks usually must be removed to allow the subfloor underneath to dry completely. For synthetic carpets exposed to clean water, use an extraction vacuum to pull water from the carpet, roll back the carpet face, and remove the saturated foam padding underneath to accelerate subfloor drying.
When wood subfloors warp or solid wood planks sustain severe water damage, structural sanding and board replacements become necessary. Reconditioning water-damaged hardwood floors requires technical skill to match wood species, balance moisture content, and sand, stain, and seal the surface for a seamless finish.
Wall Preservation and Interior Coating
Water traveling down through wall cavities damages insulation, paper-faced drywall, and decorative paint coatings. Proper wall drying prevents structural drywall collapse and suppresses mold growth.
Pry off plastic or wood baseboards along affected walls to expose the lower drywall edge. Drill small 1-inch ventilation holes along the base of the wall directly above the bottom plate to allow air movers to circulate dry air inside the open wall cavity. Once the drywall dries completely, scrape away loose, bubbled paint, patch damaged areas with joint compound, sand smooth, and apply a premium stain-blocking primer before applying topcoat paint.
When water stains cover large ceiling areas or damage high-visibility living spaces, coordinating professional surface restoration becomes essential. Working with an experienced painting company guarantees that water-damaged drywall is properly repaired, sealed, and painted with durable, mold-inhibiting coatings. Engaging a skilled painting contractor ensures that dry-wall texturing, custom color matching, and seamless finish applications restore your interior walls and ceilings back to pre-loss condition cleanly and efficiently.
Emergency readiness is an ongoing practice that combines basic DIY triage skills, routine system maintenance, and strong relationships with qualified trade specialists. By taking simple, proactive steps—such as tagging isolation valves, stocking basic emergency supplies, and inspecting critical exterior systems—you can transform potential home disasters into manageable repairs.
When unexpected failures happen, act quickly to contain the damage, protect your household, and stabilize the affected area. Know your limits as a homeowner, and do not hesitate to contact licensed professionals for complex, high-risk repairs.
A well-prepared homeowner approaches property maintenance with confidence, knowing that their quick action and reliable network of service providers will keep their home safe, comfortable, and protected for years to come.